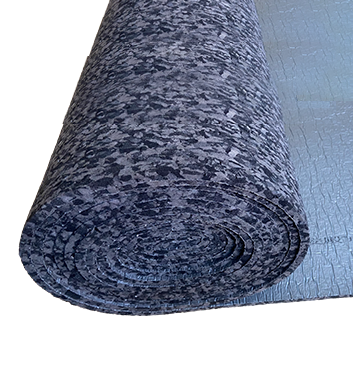
How to install the double-stickn carpet underlay
Double-Stickn Carpet underlay Adhesive Installation Method: Creating a Rock-Solid Carpet Foundation
In the realm of professional carpet installation, the "double-sided adhesive" method for carpet pads is considered the gold standard when pursuing the highest level of stability and durability. This technique involves firmly securing the pad to the subfloor using adhesive, and then bonding the carpet to the pad, creating an integrated, stable, and silent flooring system. It completely eliminates any possibility of the pad or carpet shifting, making it particularly suitable for commercial spaces, stairs, or high-traffic areas within homes.
Core Principle: Double Bonding for Ultimate Stability
Unlike traditional methods, the essence of the double-sided adhesive approach lies in creating two powerful adhesive layers:
1. First Bond: The bottom of the pad is bonded to the subfloor.
2. Second Bond: The carpet is bonded to the top of the pad.
This "sandwich" structure (subfloor-adhesive-pad-adhesive-carpet) delivers unparalleled integrity. Walking on it feels solid and firm, significantly improving underfoot comfort and eliminating noise. However, this method demands high professionalism and is essentially a permanent installation, making removal and replacement quite difficult.
II. Preparation: Materials and Tools
To do a good job, one must first sharpen one's tools. This method requires:
•Materials: Carpet, specialized carpet pad (must be suitable for adhesive installation, such as certain rubber-backed pads), high-quality latex or water-based carpet adhesive (ensure sufficient quantity), carpet seam tape (if carpet seams are needed).
•Tools: Professional adhesive trowel (notched trowel, notch size must comply with adhesive specifications), heavy-duty power stretcher, wall trimmer, utility knife, steel straight edge, tape measure, paint roller and tray (for large-area adhesive application), high-power vacuum cleaner.
Absolutely Critical: Subfloor Preparation. The subfloor must meet the highest standards of being "level, clean, dry, and sound." Any imperfections will telegraph through the finished carpet surface. It must be thoroughly swept and vacuumed; self-leveling compound should be applied if necessary, and the floor must be completely dry.
III. Core Installation Steps
Step 1: Dry Fitting and Cutting
Dry fit the pad according to the room's shape, measure precisely, and cut, still leaving about a 1 cm expansion gap around the perimeter. Similarly, dry fit and cut the carpet.
Step 2: First Adhesive Application – Securing the Pad to the Subfloor
1.Sectional Application: Roll up half of the pad. Using the notched trowel, spread the carpet adhesive evenly onto the exposed half of the subfloor. Adhesive usage should follow product instructions, ensuring clear trowel marks form an even layer.
2.Laying the Pad: Immediately carefully unroll the rolled-up half of the pad back onto the adhesive-covered area, ensuring correct positioning. Use hands or a short-nap roller to press from the center outward, expelling air and ensuring full contact between the pad and adhesive.
3.Repeat: Roll up the other side of the pad and repeat the adhesive application and laying process to secure the pad across the entire room.
Step 3: Second Adhesive Application – Securing the Carpet to the Pad
This is the most skill-intensive stage, requiring swift and precise action.
1.Position Carpet: Place the cut carpet loosely on the secured pad, adjusting its position. Similarly, roll half of the carpet back to the center of the room.
2.Adhesive Application and Bonding: Spread the second layer of adhesive evenly onto the exposed half of the pad surface. Then, gradually unroll the rolled-back half of the carpet, allowing it to contact the adhesive. Immediately use a heavy-duty power stretcher to stretch and secure the carpet in a "stair-step" pattern from the center towards the walls, ensuring the carpet is smooth and wrinkle-free, and firmly bonded to the pad. This process must be rapid to prevent premature adhesive drying.
3.Complete the Other Half: Repeat the process to install the other side of the room.
Step 4: Trimming and Finishing
Use a wall trimmer to neatly trim excess carpet at the edges and tuck it into the gap under the baseboard. Seal carpet seams using seam tape. Finally, use a heavy carpet roller to go over the entire floor, enhancing the bond.
IV. Important Considerations and Summary
•High Skill Requirement: The double-sided adhesive method requires significant technique and experience; it is strongly recommended to be performed by professional installers.
•Ventilation: Maintain adequate ventilation during and after installation to disperse adhesive fumes.
•Permanence: This method is largely irreversible; future replacement of the flooring system will be very difficult.
In summary, the double-sided carpet pad adhesive installation method is the ultimate solution for pursuing peak performance. Through two meticulous adhesive applications, it integrates the subfloor, pad, and carpet into one, providing exceptional stability, underfoot feel, and quietness. While not suitable for DIY attempts, understanding its principles can help homeowners make informed decisions when choosing professional services, creating a truly rock-solid flooring foundation for high-use spaces.
Alright, this is a detailed article about the "double-sided adhesive" installation method for carpet pads. This method provides exceptional stability and is suitable for areas requiring permanent fixation or experiencing high foot traffic.
ADLAY carpet underlay DS series is the underlay used for this installation method.
A Comprehensive Analysis of Mainstream Carpet Underlay Materials: A Guide for Your Selection